
QR Studio
Printing a QR from the Studio: from screen to paper without losing the code
A code that scans perfectly in the preview can fail on the first printed sheet, and the reason is almost never the design. It is the gap between what the editor shows you and what the printer actually puts on paper — a gap with about five known places to fall into.
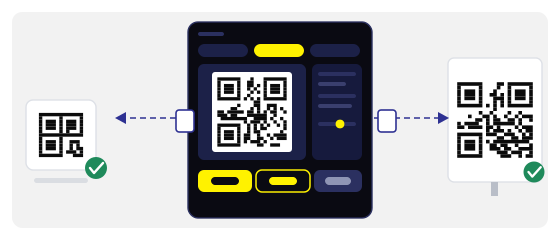
Size, quiet zone and PDF export are already set up in the Studio — nothing to work out by hand.
Open the StudioExport vector when you can, pixels when you must
The Studio writes PDF and SVG, and both are worth using whenever the print shop accepts them: they carry the code as geometry, so the same file works for a business card and for a two-metre banner without changing a single module. A PNG carries a fixed grid of pixels, and that grid has to be large enough for the final size before it leaves the app.
The rule of thumb is three hundred pixels per inch at final size, with a floor of about one thousand pixels across the whole code. Below that the printer starts rounding module edges, and rounding is what makes a code scan on one phone and not on the next.
Set the size in the export, not in the layout
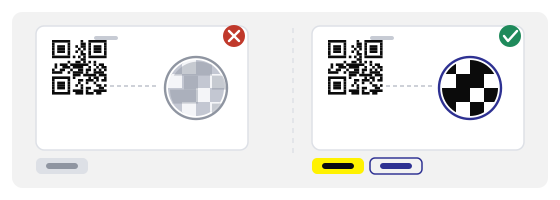
The most common way to ruin a Studio export is to make it small and then scale it up in a text editor or a design tool. A code scaled by eighty percent and dropped into a flyer comes out with edges that are no longer whole pixels, and with a white margin that has been quietly cropped by the frame around it.
Decide the final physical size first, export at that size, then place the file at one hundred percent. If a document insists on resizing it, export again rather than stretching: it takes ten seconds, and it removes the whole class of blurry-code problems at once.
How big the code actually has to be
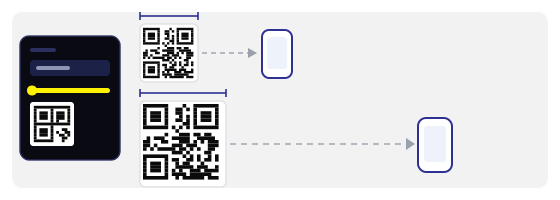
Size is decided by scanning distance, not by how much space is left on the layout. A workable starting point is a code whose side is roughly a tenth of the distance the phone will be from it.
There is a second floor worth remembering: below roughly half a millimetre per module, cheap printers and cheap cameras stop agreeing with each other. If a size calculation lands near that line, go one step bigger instead of one step smaller.
The quiet zone is part of the file
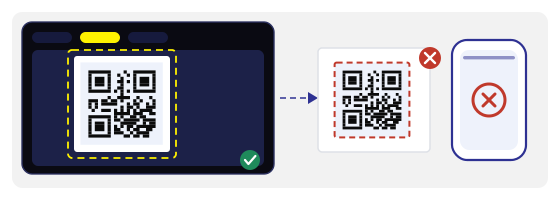
A code needs an empty strip around it — at least four modules on each side, so 2–4 mm on a small format and several centimetres on a poster. The Studio exports that margin for you, and the single most common way to destroy a perfectly good code is to crop it away while making the layout tidy.
Never place text, a border, a photo or another code inside that strip, and never trim the exported file to the black edge. The camera uses the margin to work out where the code begins; without it, a clean code looks like part of a larger picture.
Colour that survives ink
Dark modules on a light background is not a stylistic preference, it is the way every scanner reads. Inverted codes exist and some phones manage them, but a printed code that only half the phones can read is a mistake, not a design choice.
Two ink problems deserve a mention. Screens show colours in RGB and printers work in CMYK, so saturated greens and bright oranges shift on paper, and a light grey that looked safe on screen can print close to the background. And on uncoated or recycled stock, ink spreads slightly, which eats contrast at small module sizes. A mid-blue on white is safe in both worlds; pale yellow on cream is not.
Materials matched to where the code will live
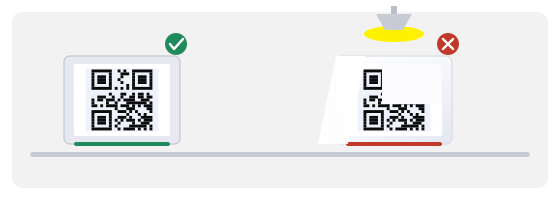
Matte finishes scan more reliably than gloss, because a reflection from a ceiling light can wipe out a whole corner of a glossy code in a photograph. That is why laminated table cards are usually a better idea than shiny protective sleeves.
Paper and card
Fine indoors, away from water and direct sun. Uncoated stock takes ink less precisely, so give the code a little more size than the calculation suggests.
Vinyl or a laminated sheet
The safe default for menus, counters and anything that gets wiped. Matte laminate, not gloss, and check that the edge does not lift — a lifting edge is where replacements are placed.
Direct to glass or metal
Clean, permanent, and unforgiving: there is no reprint, so test on an offcut first. Curved surfaces and brushed metal distort the modules, and a code on a bottle needs a flat panel rather than a wrap.
Printing a batch without printing a mistake two hundred times
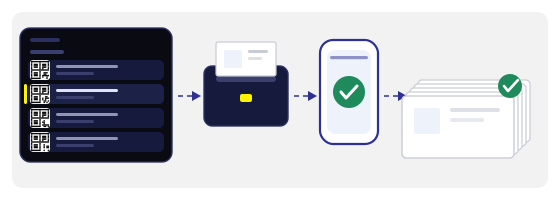
When you need many codes — one per table, one per machine, one per exhibit — export them one by one from the Studio with a naming scheme that a stranger can follow: venue-table-01, not final_v3_new. Then check one printed sheet before the run continues.
And never photocopy a printed code to make the rest of the set. A photocopy enlarges the paper grain, blurs the module edges and drops the contrast, and the loss is invisible on the copier's own screen. Print from the file, every time.
What a print shop needs from you
Four things, and the conversation takes a minute. Send the vector file rather than a screenshot. State the final size in millimetres, not «about A5». Ask for matte where there is a choice. And ask for a proof on the real stock before the full run, especially if the code is going onto anything curved or reflective.
If the shop offers to «just fit it to the page», decline politely. Fitting is the same operation as scaling in a design tool, and it is the reason printed codes arrive slightly soft.
Check the proof, not the preview
Scan the printed copy, not the screen, and scan it the way a customer would: from the intended distance, in the intended light, holding the phone at the angle people actually hold it. Then do it again with the oldest phone in the building, because that is the phone the worst case will use.
Measure the code with a ruler while you are at it. A surprising number of «printing problems» turn out to be a code that came out two millimetres smaller than intended, which is exactly the difference between comfortable and marginal.
What to fix when a printed code will not scan
Work through it in this order, because the order matches how often each cause turns out to be the real one: the margin was cropped, the file was scaled after export, the contrast is too low, the module size is under the floor, the surface reflects, or the code is simply too small for the distance.
Only one of those six is a design problem, and it is the least likely. This is worth remembering before redrawing anything.
Common mistakes
- Exporting a small PNG and enlarging it in a layout tool instead of exporting again.
- Cropping the white margin to make the layout look tidy.
- Choosing a size by what fits the page rather than by scanning distance.
- Sending a screenshot to a print shop instead of the PDF or SVG.
- Printing on gloss under a spotlight, then blaming the code.
- Checking the proof on the monitor and only scanning it after the full run.
How to build it in practice
In the QR Studio, set the physical size before you touch anything else, keep the default margin, and export PDF if the printer accepts it. If you need several codes for one place, duplicate the design instead of rebuilding it — a set of table cards looks deliberate only when the codes are identical in size and position.
Use the QR scanner on the printed sheet in the room, and if the code is going to be reprinted later — a new menu, a changing offer — make it a dynamic code so the destination moves and the print stays. Reprinting is the most expensive way to change one line of a page.