
Materials
How to print a QR code: size, quality and scan distance
A code that looks perfect on a monitor can fail completely on paper. The printer is rarely the problem — distance, light and material are. Here is how to work out the size and what to test before the print run.
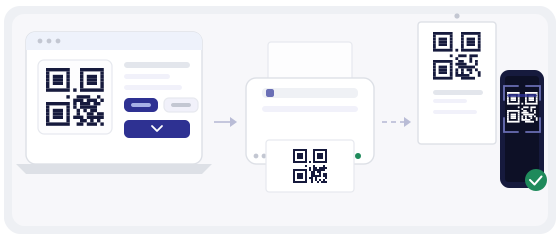
A screen and a sheet of paper are different conditions
On a screen you hold the phone ten centimetres away, the display glows and the contrast is perfect. On paper the same code may hang three metres away, under a ceiling light, on a surface that throws a window straight into the camera.
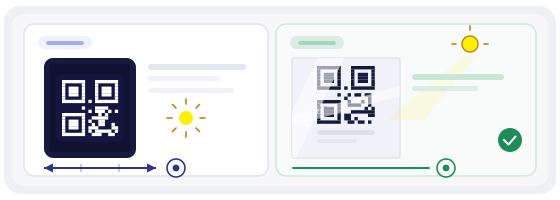
The file has not changed. Everything around it has. That is why a code designed at your desk comes back from the printer on a box and refuses to scan in the shop.
Work out the size from the distance people scan at, not from the distance you are looking at right now.
Distance decides the size, not the other way round
A rough rule holds almost everywhere: the side of the code should be about a tenth of the viewing distance. In practice these numbers work:
Those figures are a floor, not a target. If the code can be bigger, make it bigger: spare legibility never hurts, and a shortage always does.
The module in millimetres is the real criterion
Size in centimetres tells you very little on its own. Two codes three centimetres wide can behave completely differently, because one holds forty modules and the other a hundred. In the first the module is 0.75 mm, in the second 0.3 mm.
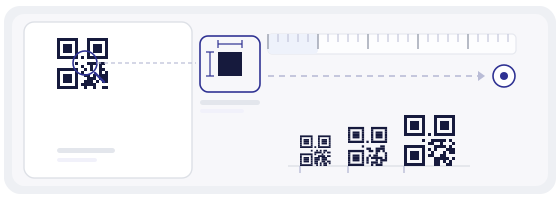
The practical threshold for offset and digital printing is about 0.4–0.5 mm per module. Thermal receipts, screen printing on fabric and marking on a rough surface need more, because ink spreads and thin lines vanish.
The check is simple arithmetic: divide the width of the code by the number of modules in it. Below half a millimetre, either make the code bigger or shorten what it contains.
Which format for which job
SVG
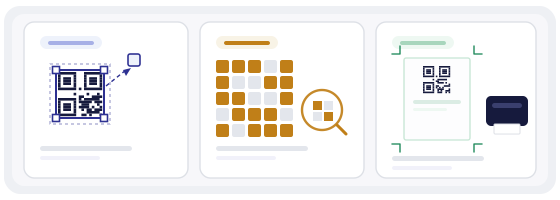
Vector. Scales to any size without blurring. The right answer for a print shop, labels, packaging and anything heading to professional printing.
PNG
Lossless raster. Good on screen and for small print, provided it was exported at the final size. Not for enlarging later.
Two formats to keep out of a print workflow: JPG, because compression artefacts land exactly on the module edges, and screenshots, because they record whatever the screen happened to render in that moment.
Stretching a small PNG up to poster size does not make the code bigger, it makes every edge soft. The reader has to guess where the black square ends, and it often guesses wrong.
Many print shops ask for a PDF with vector content and a defined bleed. An SVG placed in a layout application and exported to PDF usually satisfies that with no loss at all.
The quiet zone: the margin everyone trims
A code needs empty space around it. The reader uses that margin to work out where the code starts and stops. Trim it flush against a photo, a frame or a line of text and the code may simply refuse to catch.
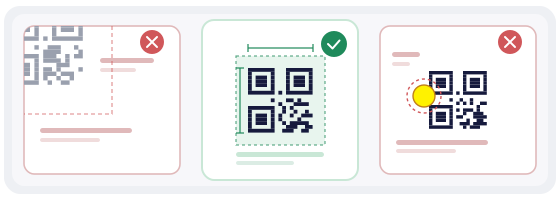
Leave at least four modules of margin: for a three-centimetre code that is roughly 3–4 mm. It is also worth leaving the inside alone — large white patches in the middle confuse the reader just as much.
Contrast, not colour
What matters is the difference between dark and light, not how nice the palette looks. Black on white always works. Navy on cream almost always works. Light grey on white almost never does.
An inverted code, light on dark, is often read by modern phones but not reliably by older ones. If your audience is mixed, do not gamble: keep it dark on light.
On a transparent sticker, print a solid white backing under the code. Without it the background becomes whatever sits underneath, and the contrast disappears along with the quiet zone.
Materials that ruin codes
- Gloss lamination — bounces a lamp or a window straight into the camera.
- Clear stickers — the quiet zone becomes whatever is behind them.
- Very dark stock — a dark code on a dark background stops being distinguishable.
- Curved surfaces — bottles and cups distort the pattern at the edges.
- Fabric and mesh — the weave eats small modules.
Matte beats gloss almost every time. On curved packaging, either keep the code flat or move it onto a separate label.
An office printer: where it really falls short
A laser printer gives crisp edges, but toner flakes off on a fold — a code on a creased sheet loses modules over time. An inkjet on thin plain paper spreads, and the edges go grey.
Three things to do before you hit print: turn off “fit to page”, because the printer rescales quietly; turn off economy mode, because it renders modules grey instead of black; use matte paper of 120–160 gsm rather than the cheapest ream you have.
And never print a code on paper that shows through. If something is printed on the other side, that something becomes part of the pattern.
A proof print, step by step
- Print one copy at actual size. Not “fit to page” — actual, and check it with a ruler.
- Scan it with two different phones, one of them older. If it fails on the older one, most of your audience is closer to that phone than to yours.
- Scan it in the real place under the real light. A code tested at a desk under a lamp behaves differently on a wall in daylight.
- Confirm where the code leads, then order the run. Finding a test link before printing is much cheaper than after.

Checking the print run
When the batch arrives, do not take it on trust. Pull the first sheet, one from the middle and the last one — that is where a printer starting to struggle shows up.
Step back to the distance people will scan from and try to read all three. Then confirm they all lead to the same address. On thermal paper, check again the next day: that stock darkens on its own and contrast drifts down.
Why dynamic codes save a print run
If a printed static code points at an address that later changes, every sticker, poster and label becomes decoration. The only repair is a reprint.
A dynamic code keeps the printed pattern and holds the destination behind a redirect you control. The material stays valid, and you can see how many scans it received — which tells you whether the placement works.
That is why every code created here is dynamic: you will never have to throw away a printed item because a link moved.
Preparing the file
The generator exports SVG and PNG at high resolution in whatever size you specify, which covers most print jobs. For layouts and finished printed pieces — table cards, business cards, sheets of labels — the margins and resolution in QR Studio are already set correctly.
Before you send a run to press, put the finished code through the QR scanner. It shows exactly what is inside, and that is the cheapest check available.